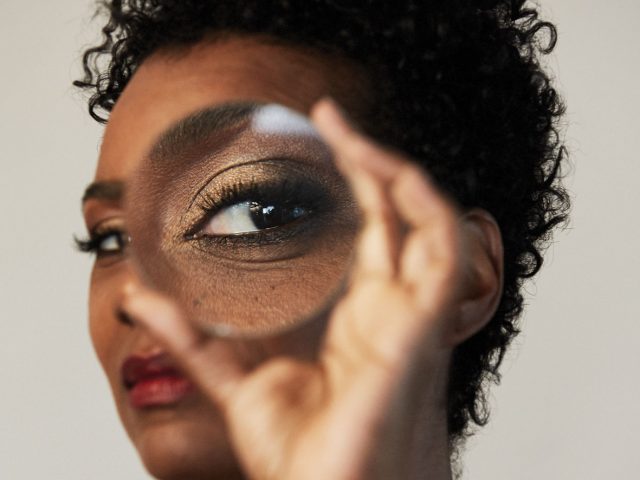
DIY FACIAL MASKS
Written by Rosalind Thomas Images by Amanda De Simone

Simplicity. We seek it in all areas of our lives. But if you’ve stood at a beauty counter trying to make out the tiny print on a label swollen with indecipherable chemicals, you’ll know that in the cosmetics industry, things are rarely simple. Technological innovation produces some amazing results in certain products, but it’s often the stabilisers, preservatives, fragrances and colours that accompany the active ingredients that we might prefer to avoid. However, some of these active ingredients are just as easily sourced from the grocer as the pharmacist, and are found in foods we keep in the pantry; by mixing and applying natural ingredients as and when needed, those active ingredients are at their most potent.
So, whether you are seeking greater control over what you use on your body as well as in it, simply prefer to save your pennies for other pursuits, or – what luck – yourself with a moment to pamper yourself far from the contents of your beauty cabinet, a mask made from natural ingredients is a ritual we promise you’ll savour.
Before we begin, a brief disclaimer: natural
ingredients are typically non-reactive, but should skin become irritated in any way, remove mask immediately with lukewarm water. Ongoing or severe skin concerns should always be addressed by a dermatologist who can identify and treat any underlying issues. All clear? Great,
let’s continue.
STEP 01
Possibly the most diicult step: ind some time. While a homemade mask can be refrigerated for an hour or so, many of the active elements of these natural products begin to break down immediately. We recommend mixing and applying straight away to maximise efficacy.that means turning of electronic devices and including a quiet environment away from distractions.
STEP 02
Assess your skin, and consider what would benefit it most right now – extra hydration? Firming and toning? Is it looking rough or dull? Take an extra moment to acknowledge what’s looking good too!
STEP 03
A little ‘mise en place’ will ensure a calming treatment experience. Chose a bowl made of non-reactive material, such as glass, for mixing. A muslin cloth on hand can be useful to help press the mask into the face and also
for removal. A fan brush makes an ideal applicator, but clean fingers can be just as effective. The more finely an ingredient can be processed, the easier it will be absorbed
by the skin.
STEP 04
A few cucumber slices to place over the eyes not only send a strong ‘do-not-disturb’ signal, the caffeic acid they contain is an antioxidant with proven anti-inflammatory qualities.
STEP 05
Prep skin with a gentle cleanser. Skin absorbs nutrients more easily when damp, so just pat gently to remove
excess water, make sure you’re comfortable and ready to enjoy some serious self care.
TIGHTEN AND REJUVENATE
Egg white is high in vitamins A and B, but it is the proteins and amino acids
that have the most benefits for skin. Lysozyme in egg white is an effective astringent, meaning it can tighten pores, zap blackheads and draw out excess oils. The protein Albumin in particular is responsible for egg’s tightening effect on the skin – we’re talking a natural (albeit temporary) mini facelift. Combining egg white with grapes adds the power of resveratrol – a breakthrough antioxidant that has been found not only to act on the surface of the skin itself to fight free radicals, but may also stimulate synthesis of antioxidant enzymes, meaning that it encourages skin to increase its own
defenses against environmental aggressors like UVA and UVB from the sun.
To prepare this mask, separate an egg and whisk white into a light foam with a fork.
As resveratrol is found in the skin and seeds of grapes, ideally choose a seeded variety of grapes and purée in a blender (maceration with a fork is an alternative). Combine grape pulp and egg white, apply to skin. he tightening effect of the egg should be felt as the mask dries. Relax and remain still for the best result! Once dry, remove gently with a cold cloth to maximise the lift.
BRIGHTEN AND REPAIR
Damage from the sun’s rays has a significant effect on skin condition – from surface dehydration to pigmentation, dullness and general premature aging as free radicals slow down skin’s ability to rejuvenate. Vitamin C is a gold standard, scientifically proven ingredient for treating UV damage, brightening skin and even improving its moisture retention abilities. It is highly bio- available, meaning it’s easily absorbed into the skin, but the challenge with commercial Vitamin C products is stability.
So, get it straight from the source, using freshly squeezed lemon. High in the potent L-ascorbic acid form of Vitamin C, lemon also contains citric acid which acts as achemical exfoliant to dissolve away dead and damaged cells that make skin appear dull. Combining lemon with pomegranate adds the antioxidant anthocyanidin (responsible for the fruit’s vivid red hue), which can reduce pigmentation caused by sun exposure. The pomegranate’s juice also acts to dilute the lemon. Combine the juice of one lemon with the juice of a fresh pomegranate and apply to skin with a cotton pad or fingers. Note that the acidic actives in lemon juice can cause irritation. Just as with a commercial Vitamin C product, begin with a weak dilution and increase intensity as skin adjusts over multiple treatments. The final step in this treatment? Be diligent in applying sun protection every time you leave the house.


CALM AND HYDRATE
Since the time of the ancient Egyptians, oats have been a prized ingredient in
skincare treatments. A scoop of humble oatmeal can transform dry, irritated skin, thanks to this trio: gentle saponins that cleanse without stripping skin, soothing avenanthramides that reduce redness and polysaccharides that hydrate and protect. Combining oats with chamomile doubles these soothing properties, as the herb has its own antibacterial, anti-inflammatory qualities. (Although rare, allergies to the daisy family including chamomile are possible, so please take this into consideration when applying chamomile topically).
The more finely the oats can be milled, the better your results will be with this
mask. A coffee grinder is excellent for preparing oats. Simply combine a handful of oats with the contents of a chamomile teabag and mill. Steep the mix in warm water for a few minutes before applying. his mask is beautiful not only for the face but the entire body, or added to a warm bath.
REFRESH AND REVIVE
So this last preparation requires some forethought – but you can make up a batch in advance. It’s also less of a mask and more of a toner. While commercial toners often rely on alcohol to tighten and strip oils from the skin, these parsley and kiwi ice cubes are a refreshing and nourishing way to complete your treatment, as a daily addition to your routine or as a pick-me-up after a night of overindulgence. Parsley’s bright green colour is a giveaway – it’s packed with Vitamin C and antioxidants, but is mild enough for frequent use. Kiwi contains fruit acids that gently remove dead cells from the surface of the skin. Combined and frozen, they make a perfect speed treatment to increase circulation in the skin. To reduce puffiness and congestion, gently massage the cubes over the face in a downwards motion beginning on the sides of the neck, ears and nose, then around the orbital bones of the eye socket. After a few minutes of massage, rinse away with cold water.
This editorial was part of our 3rd printed issue. You can get your copy here. Photography: Amanda De Simone Text: Rosalind Thomas